Early bloomers

What Plants Are Known To Bloom Early


Star Magnolia

Star Magnolia is the early est blooming magnolia in southeast Pennsylvania. This slow growing deciduous shrub to small tree produces a very showy white flower l
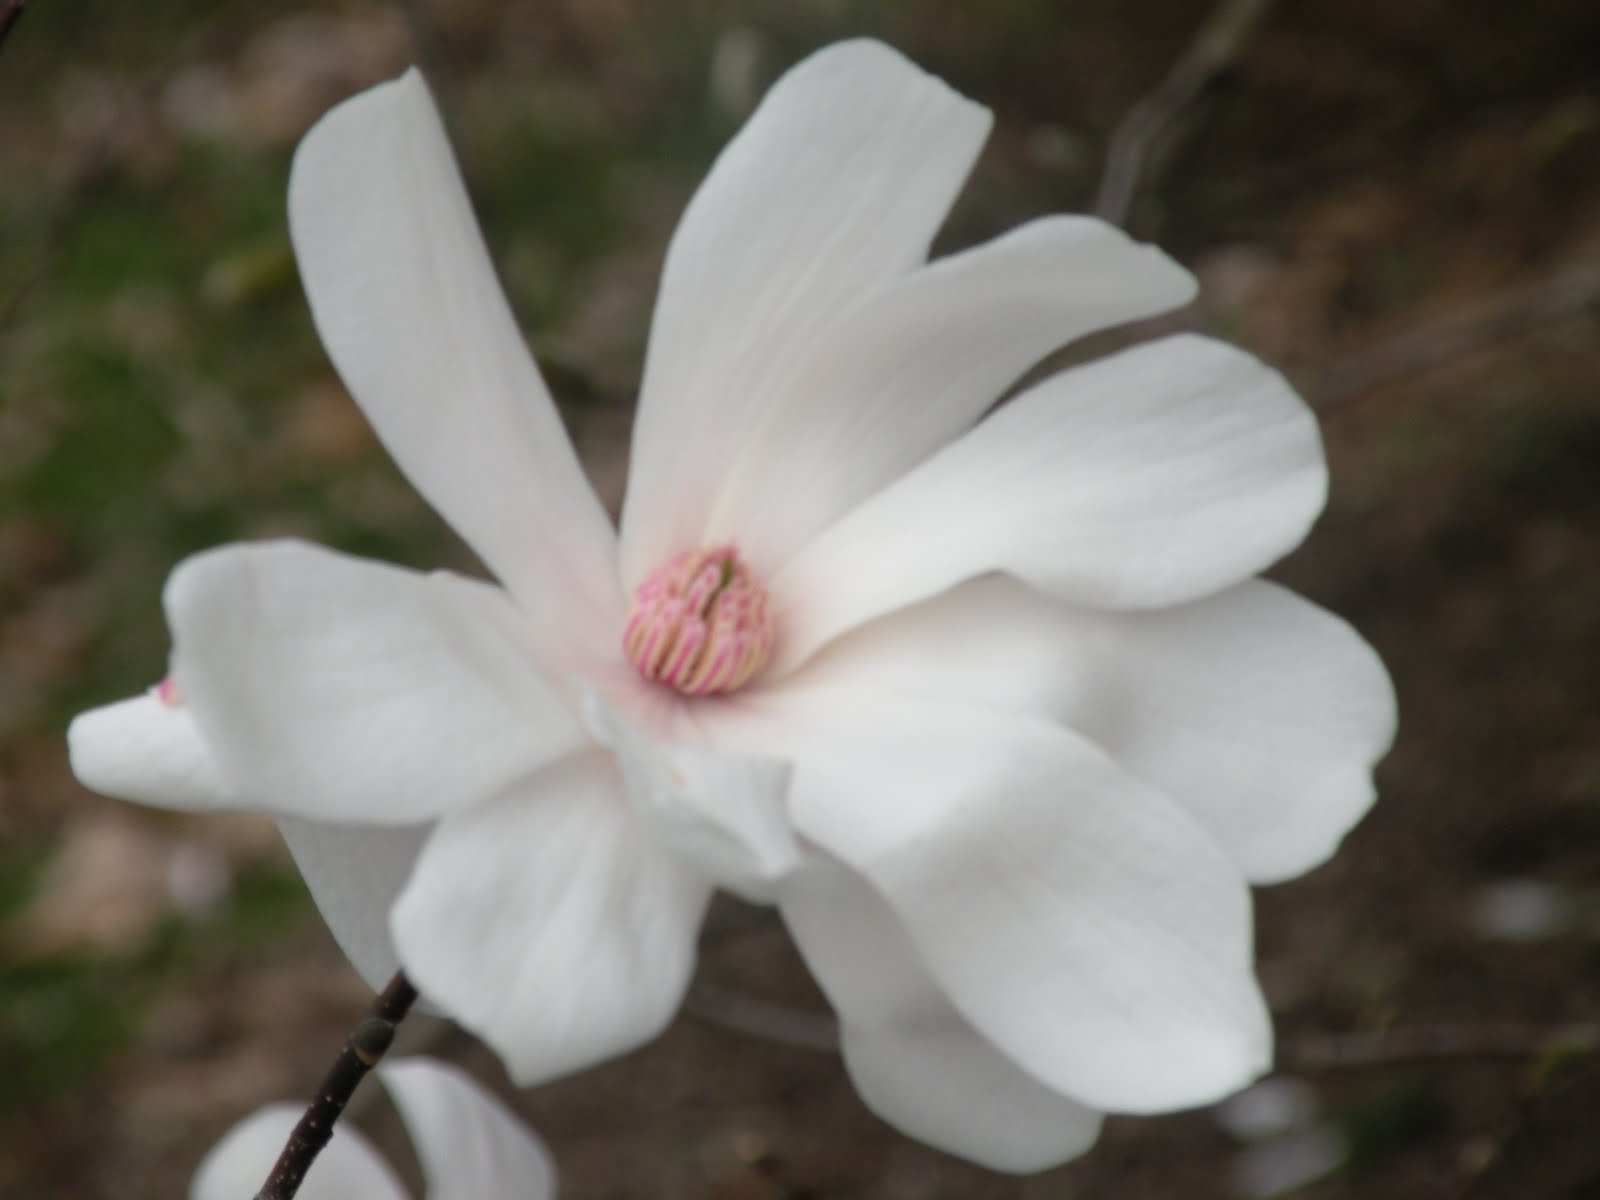
ate March to early April. The fuzzy bids open before the foliage appears producing a 3-4 inch white fragrant flower. Because it does bloom so early frost and cold winds tend to blacken blooms and fall off sooner. This plants slow dense growth habit makes it excellent for a small garden. This Multi stemmed tree has a light gray color on main trunks, the younger twigs have a dark brown color. Star Magnolia need very little pruning unless you are looking for a tree form, that only involves lifting the lower branches to expose the multi able trunk. All pruning should be done after plant has bloomed in spring to not inter fear with next years bud Set.
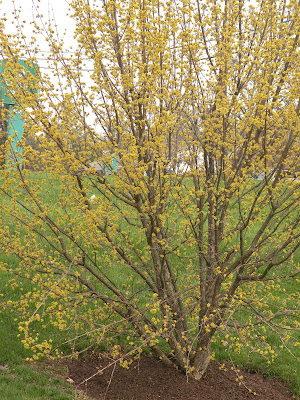
Cornus mas

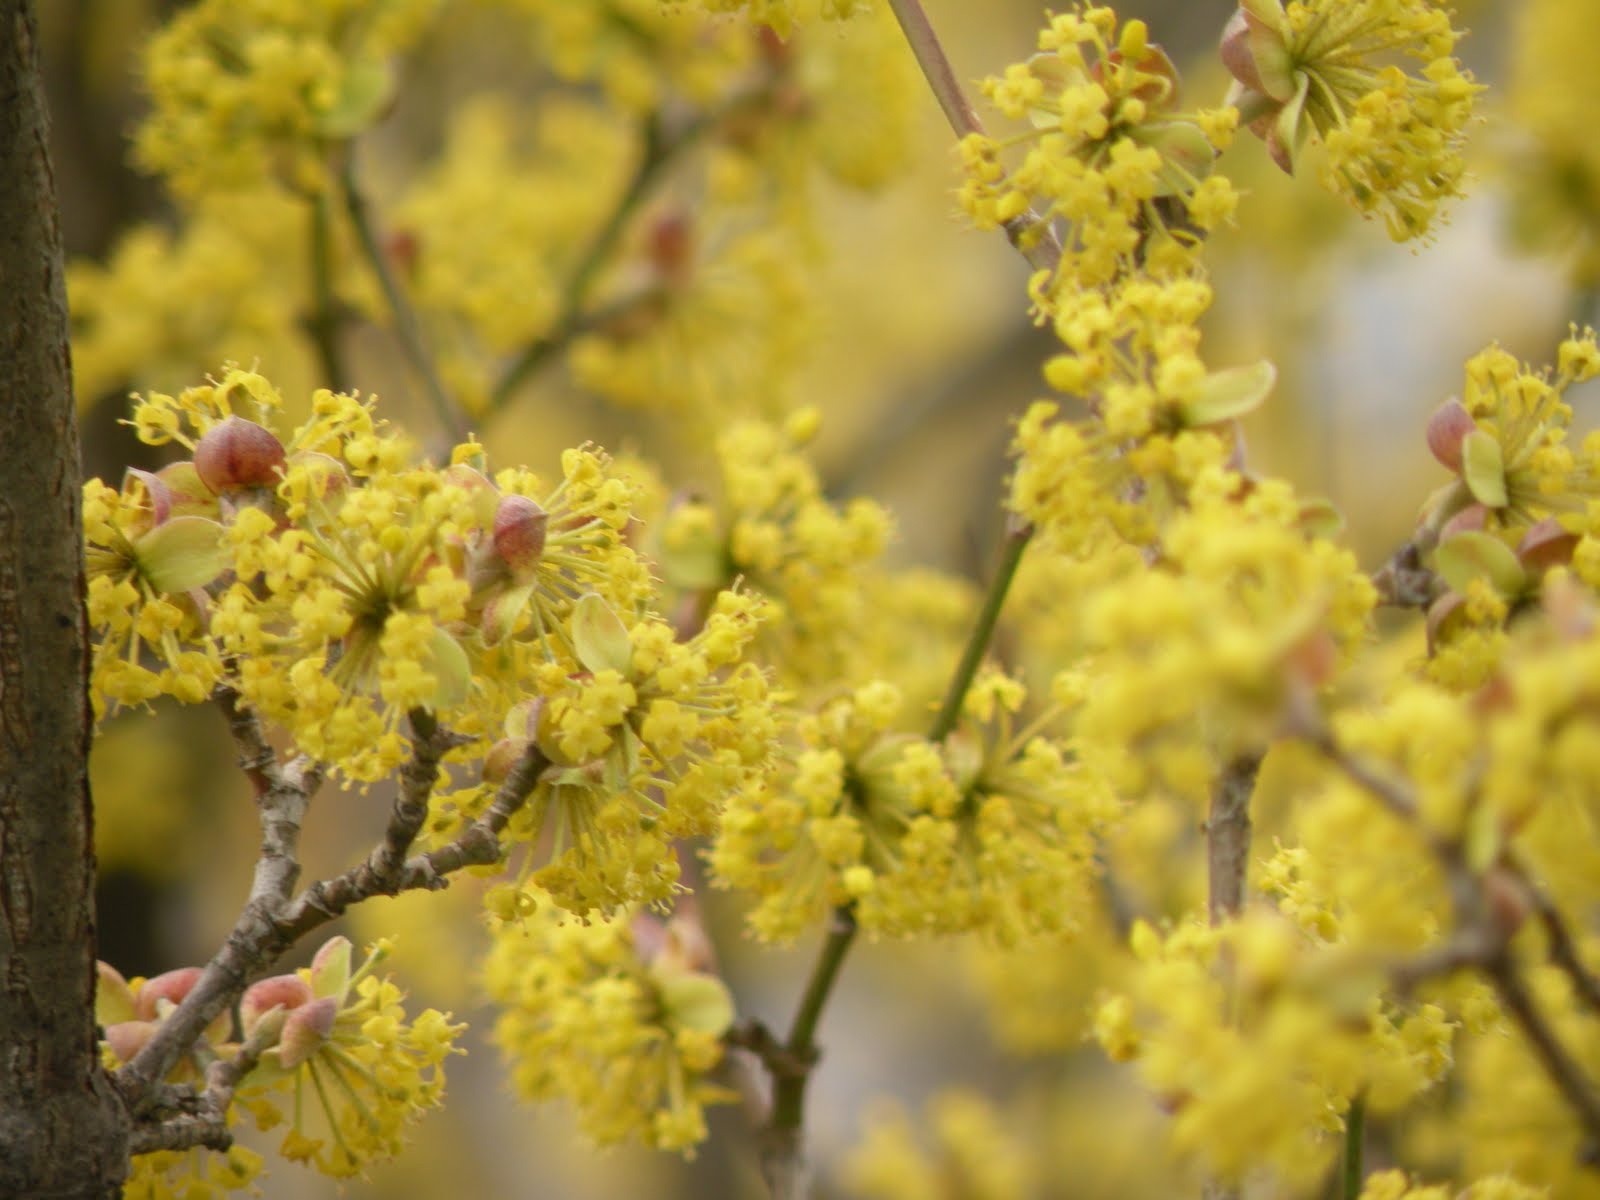
Another excellent early blooming tree is cornus mas, The common name is Cornelian cherry dogwood. This is also a large deciduous shrub to small ornamental tree. The small clumps of yellow flowers appear late winter early spring before the foliage emerges. Can be trained to become a small ornamental tree by lifting lower branches to expose multi stem grayish brown mature trunks. The deep green almost oval shaped leaves turn slightly purple color in fall. Very clean tree, no real insects or disease problems.

Prunis Okame

This one of the ear lest blooming Cherry’s in our area. It has a tight upright growth habit that rounds off as it matures. Has very showy reddish-bronze bark that stands out in a
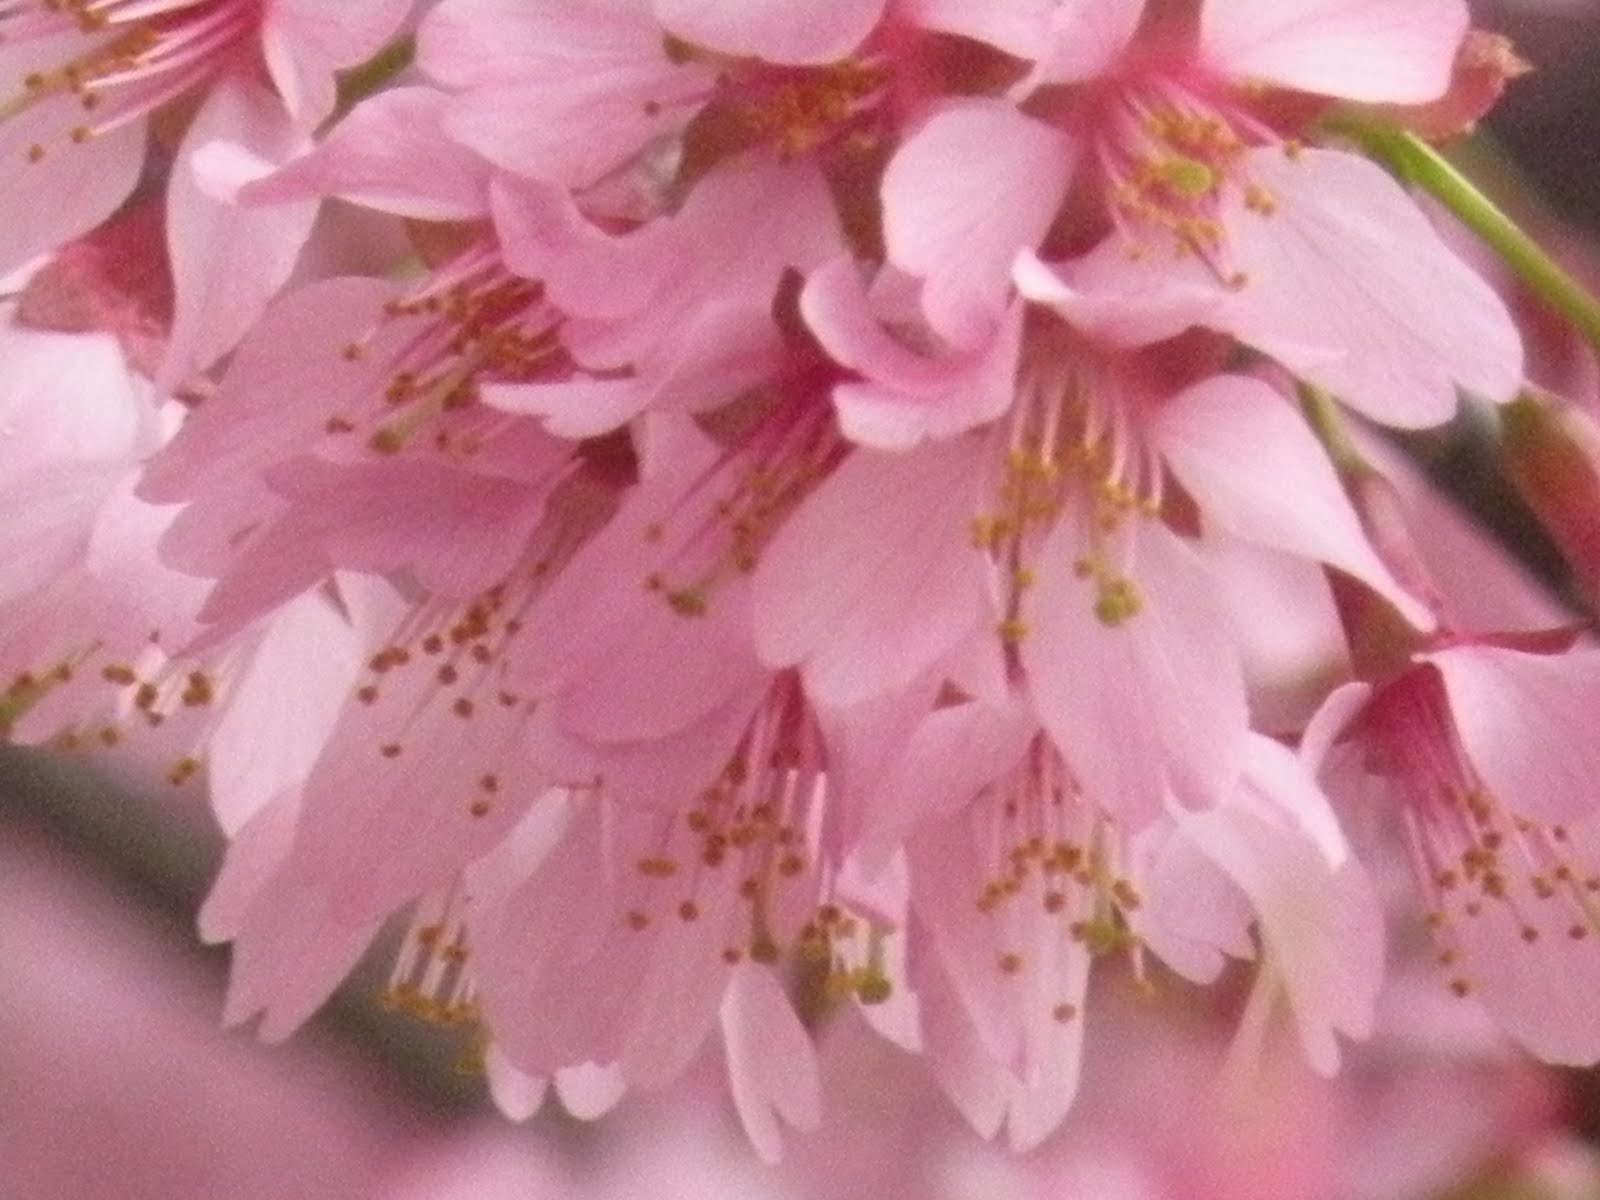
ny landscape. The small pink flowers emerge before the foliage but do not tend to last real long because of rain and cold weather this time of the year.This plant is sometimes used as a street tree or in parking areas because of its tight upright growth habit, its also good for small gardens and hedge row plantings. It has oval shaped leaves that are dark green in color during the summer and develops a rather good fall color of orange and copper. This is three good choices for small early blooming ornamental trees that would look good in any ones garden.

Weed Control

Types of Weed Control For Outdoor Landscaping

Herbicides

One of the most time-consuming jobs in our landscapes is trying to keep our lawns and gardens free of weeds. There are a number of chemicals that are available to use to help with this pain-staking chore. Most of us do not like using any more “chemicals” around our properties than we have to, for fear of them being toxic to our kids, our pets, and the environment. Pre-emergent herbicides have been put under stringent tests by environmental organizations and no safety issues have been found with these products. If you would compare these tests with the same tests done on common table salt you would be very surprised. There are some terms we need to discuss when talking about herbicides. They are:

· Pre-emergent
· Post emergent
· Selective
· Nonselective

These are all terms to describe how synthetic herbicides work to control unwanted plants or weeds. A pre-emergent herbicide will affect the tiny first roots of seedlings thus preventing them from growing, while post emergent herbicides are used on weeds that have germinated or hard to kill weeds such as Canadian thistle. Selective herbicides are used to remove some species of plants and not others. A nonselective herbicide will kill any plants it is applied to; a good example of this is Roundup. While all herbicides help to control weeds, knowing what type of weeds you need to eliminate will help you in selecting the right products to use. Contact us at River Valley Landscaping and we can help you design the right program to achieve optimum weed control.

Pre-emergent

For best results when using pre-emergent herbicides timing is everything. These products should be applied several weeks before germination, and watered in after application so this material can move in the top inches of soil to create a weed barrier. Weed seeds will germinate when soil temperatures are consistently over 50°F. Some gardeners prefer to apply pre-emergent before the Forsythia blooms. In southeast Pennsylvania pre-emergent herbicide should be applied around the 15th of March to control spring and summer weeds and reapplied by September 15th to control fall and winter weeds.

These chemicals can be applied any time during the growing season to control ungerminated seeds. Pre-emergent products have a life of between 60 and 90 days depending on the amount of moisture and soil content. Multiple applications can be made, be sure to read the label so you are not over applying beyond the recommended rates. These products can build up in the soil if overused and can burn root system of many plants.

Preen vs. Snapshot

Preen is a pre-emergent that is found in a lot of garden centers and box stores in the area. Trifluralin is the active ingredient in Preen; it is also the active ingredient in Snapshot but at a much higher rate. Snapshot also has another active ingredient Isoxaben, which gives this product extra protection against some difficult weeds and grasses. Snapshot is the preferred choice of many nurseries and landscape companies because of its wide label. Only select dealers sell these professional products in larger quantities. If you analyze the price of the two products, Snapshot is cheaper per 1,000 square feet and has that wider label.

One of the hardest weeds to control is Nutsedge mainly because one single weed is capable of dropping thousands of seeds. Knowing how to identify this weed and its life cycle is very important in its control. There is a pre-emergent herbicide labeled just for this weed called Freehand.

Since March is not a very busy time in the garden, set aside some time to apply some pre-emergent or contact us at River Valley Landscaping to have it professionally applied for you. Pre-emergent herbicides will not control 100 percent of your weeds, but it should reduce the amount of hand pulling and the amount of more toxic post emergent herbicides you should have to use. Giving you more time to sit back and enjoy your garden.

Smart Design = A Growing Investment

After spending numerous meetings with this client trying to find out their final expectations one of them said to me, ” We have a 1/2 million dollar home with a million dollar view and a 50 cent landscape. Fix it.” That gave us the direction we needed.

I understand this is an unusual property, but that does not change the process of creating a design that last a life time. I realize a landscape is always changing and we need to always look to see what is working and what is not. I’m sorry, but I’m going to share my frustrations with most landscapes. I feel most landscapes are disposable landscapes. They last about 10, maybe 15 years and then they look awful. I am a firm believer that age should increase the value of well designed landscape. I realize most people don’t landscape their home for resale value, but their is no reason why it shouldn’t increase in value. Does anyone want a buyer to pull up to their home and their first thought is wondering how much they have to spend to fix up the landscape?

Invest in a Long-Lasting Landscape Design

Their are two basic things that can ruin the long term value of a landscape. First is the quality of the construction. The products you choose and the installation procedures can play a large role in how long your hardscape elements last. Most hardscape elements will have some level of failure over enough time. I suggest you look hard with your designer at the pros and cons of your hardscape options. More expensive does not always mean longer lasting.

The design can also play a major role in whether your property will increases or decreases in value over time. I always wonder why people install a shrub that grows 8-10 feet and then try to maintain it at 4 feet. Did they ever think maybe there is a better plant choice? I will confess I have done this from time to time. I try to only do this if there is a long discussion with the client. There are times when everyone understands a plant could require more maintenance to achieve a certain look. This should not be taken for granted.

This project has only been in since 2002. I believe it will take a few more years to prove this project has passed the test of time. Almost any project can have great before and after photos. I am most proud how this project keeps getting better each year. The rooms and the views get more defined as time goes by. There is no reason why you can’t have landscapes that looks good when and continues to look better with time. That is a growing investment.

Perennial Plant of the year

The Perennial Plant Association has chosen Baptisia australis or False Indigo as this year perennial plant of the year. This is a very hardy plant that tolerates a wide range of climates. Native to river banks from Vermont south to the Shenandoah Valley.

Specifications Of The Baptisia Australis (False Indigo) Plant


Its blue to purple upright flowers stand out in the garden, Although it only blooms 3 to 4 weeks in late spring to early summer the brilliant colors makes it totally worth it. False Indigo will grow to 3 to 4 feet and spread just as wide, it will grow in full sun or part shade, it can tolerate dry to medium soils and is very drought tolerant. Large black seed pods set in after flowering giving this plant another interesting element. This plant attracts butterflies and is also great for cut flowers and dried flower arrangements. Because it is a self seeder this perennial is best used in border gardens, meadow gardens, woodland gardens, or cottage gardens as it does naturalize very nicely in native soils. We are all looking for plants that are low maintenance and this one certainly fits that. It really is border line between perennial and shrub and has a tendency to flop open in the center, the only real maintenance needed is cutting back in fall or early spring. So take a look at the beauty and features of this outstanding perennial.

Where do I start with a Pool Project?

Here is the pool project I promised you. This client asked me a common question, “We want to build a pool, but when do we get River Valley involved.” My answers was NOW. Most people don’t realize how much everything intertwines. People often fail to contact a landscape designer or architect early enough. Most commonly we find someone builds a house and puts in there walkways, driveway, and sometimes a patio then calls a landscape company. The problem is these things are all put in without any forethought to what is next. We often find walkways are too close to the foundation of the house. This limits the choice of plant material and/or increases the maintenance these plants will need. You would be amazed how many more choices we have by just adding 2 or 3 feet.

When To Contact Landscape Designer When Building A Pool

Another mistake is calling the pool contractor first. Their knowledge is often limited to the design and construction of the pool itself. They usually site the pool for what is easiest for them and not what makes sense overall. I am a strong believer in one should contact a designer before a house is ever built or purchased. A designer can see past what is there and see what could be. I could go on and on about the savings with a well thought out design. The savings even magnify when landscape construction is done simultaneously with the construction of the home. It looks like that is an idea for a future post. When designing my house I had them add a wrap around porch. We added, moved, and deleted windows and doors to improve circulation from the inside to outside. These are decisions that can’t be made without a vision for what is unseen.

This first video shows the process from start to finish. If you enjoy seeing before and afters, I think you will love this transformation. I will mostly mention things you may not pick up in the video. We started working on the design concepts in late fall of ’07. We sat down with the couple to take inventory of what they were looking for and how they plan on using this space. I find a lot of people have a limited idea of what they are looking for and how to communicate it. This is at no fought of the client, it is the designers job to dig deeper. A good designer will listen, but a great designer will hear the difference from what the client is saying and what they mean. Most people don’t realize the possibilities of their project. A well experience designer should be able to guide the client through each step of the process. This client had a good idea of the end goal, but needed help on getting there.

After getting a good feel of what they were looking to achieve, we took measurements and elevations. Elevations were very important on this project. We were dealing with a side sloping yard with a daylight basement. We also were restricted by a sand mound on one side, the reserve on the other side and an easement in the back. Our pool fencing could not not have been moved more then a foot. Although we were restricted side to side the real challenge was the elevations. I felt it was important for the pool house elevation to feel like it was the same elevation as the house. River Valley set all the elevations for this project. If the pool was just a couple inches higher or lower it would have restricted the circulation around the pool deck. By pouring a concrete wall on the lower side of the property, it allowed us to maximize the square footage we had to work with. This wall was raised up past the pool elevation to eliminate the need for fencing on that side of the pool.

The pool has a sunbathing shelf, a sitting bench running along one entire side and a diving area. The far wall helps nestle in the pool and imply a room inside of a room. The upper pool house terrace is the main entertaining area. It includes the pool house, outdoor kitchen and the hot tub. The original pool house and outdoor kitchen designs were done by River Valley. We then called in the original house architect to redesign the pool house and outdoor kitchen.

All the walls playoff of the house’s architecture. We used a combination of stucco and stone veneer to acheive the continuity. It took us awhile to nail down the patio surface. We considered concrete pavers, stamped concrete and finally decided on a Travertine stone. Travertine most commonly is beige in color. The house was made up of brown tones, so Travertine was very easy to introduce.

River Valley also designed and installed all the outdoor lighting. Lighting extends the usability of any landscape into the evening. I often say you get the biggest bang for your buck with lighting. This home owner complimented things along the way, but nothing like the first night the lights were on. He called me that night and said, “You gotta get overhere and see this.” I put the kids to bed and headed over. It always amazes me each time I go back and see projects at night. I have done lighting so many times, you would think I would know the impact it makes.

This video is from our clients perspective. Hope you enjoy.

Garden Art???

A lot of people ask me what does a landscape designer do in the winter? My response is usually a lot of planning for the spring. My planning is mostly consumed as the co-owner and not as the designer. I prefer spending time working on designs, so we are ready for the hectic spring. Next week I will feature a pool project. Check in. This is a must see project. We actually started the design process in the fall of ’07 and had them swimmer for the summer of ’08. It is never to early to start planning.

This winter has been a little different. I spent the last couple weeks painting a mural in my basement. I love to put a creative touch to almost everything I do. I designed the layout of my basement and some day will post that as well. I have always been intrigued by painting and never made the time to take it up as a hobby. This was my first painting and I found it very interesting to learn how the different paints respond to different brushes. The mural is in my kids play room which will most likely turn into something else some day.

Landscape Designs With Garden Wall Art

Spending years coloring drawings, I natural was drawn to a landscape scene. I love the sense of age stone walls bring to the landscape. The containers sitting in the window sills show someone has taken ownership of this old stone ruin. Leaving the grasses to grow in front of the wall is demonstrating design constraint. The simplicity of the nature allows the wall to speak for itself. As designers, we often fail by trying to add vs. letting along. We need to ask ourselves are we really enhancing the view, the space, or the function by adding more.

I’m not sure when or if I will ever do another painting like this. I guess time will tell. I’m sure I will continually make touch ups or improvement as time passes. Maybe I’ll follow my own advise and let alone what is already finished…


Metasequoias (Dawn redwoods)

Specification Of The Metasequoias (Dawn Redwoods) Tree

Dawn redwoods are in a small class of trees known as deciduous conifers. This means it does produce an evergreen type needle but it looses it every fall, also in this group are baled cypress and larch. One of the interesting facts about this group of trees is that they are regenerative, this means that if you were to cut down a dawn redwood it would regrow from the stump to form a new leader. The root flair of this tree is one of the most outstanding parts. With its orange/brown color it produces several large buttress like root flairs that extend several feet up the trunk. This tree produces small upright spreading branches that are well attached to a straight central trunk. This tree requires very little pruning to keep its pyramidal form. Optimal growing rate for this tree is about seven feet a year, for that you will need full sun, lots of deep ground water and a well drained, acidic soil. Many dawn redwoods in this country that are less than fifty years old have already reached the 100 foot mark. Although it is a very fast growing tree, it does not like to be crowded among other trees, it will not do very well in that situation at all. The lacy green fern like foliage that comes out in spring and lasts though the summer months turns a yellow /orange color after the first frost. Like the baled cypress it will grow in standing water, so it is a very good plant for wetland areas. Lighting protection is recommended for older trees since they are usually the tallest trees and would be the first ones hit. So if you are looking for a large mejestic giant for your garden give this plant another look.

Week Three: Getting so so Close.


Wow what a change this week. That is how a lot of projects go. You don’t see much happening and then all of a sudden instant change. I think this is the cause in so many hardscape projects because so much goes into taking measurements, shooting grades, and preparing the base. These are things you may not appreciate at the time a project is done, but it means everything when you look at your projects durability.

I said I would go over some smart design choices that saved money and also extended durability. One smart design choice was the location of the grill and step. The upper patio will serve as a grilling station and a transitional landing for the lower dining area. Keeping the grill on the existing concrete pad helped save cost from pouring more concrete or digging footers. We were able to frame right on the concrete pad. Having the grill at the far side of the patio helps give a cozy nestled in feel.

Matching Landscape Stone Designs To Grills

The existing concrete size was perfect. We did not feel the need to extend the upper level out at all. This saved the cost of adding block work that would have been needed if we were to extend out the upper patio. We chose to face the existing concrete to match the stone on the grill. The stone does a couple of things. First, it brings continuity. Secondly it brings durability and stability to the step elevation. The alternative would be to face the step with a decorative block. I didn’t like that idea for one main reason. It would be very hard to ensure the block wouldn’t settle at least an 1/8″ over the next ten years. When this happens the top patio and the step will no longer be level causing a trip hazard. As we have it, if the lower patio settles an 1/8″ over ten years, you won’t notice the step is now 6 1/8″ instead of 6″. Finally it was less expensive and faster to install.

We now have everything finished except the lighting and some plantings. I’m looking forward to getting the boxwoods in. I think they will really help form the space. I think if we get about two or three nice days we will be able to finish. I wish I knew when that would be. I’ll keep you posted.

Week Two: Another wet week and getting colder

Concrete Backer Boards In Place For Grill

Well, you never know how much work you are able to get done in December. We were able to get a little farther this past week. We got rained out one day and froze out on Friday. It looks like we might have some warmer weather to start off the week. Let’s hope it stays dry before the colder temperatures come in toward the end of the week.
Better picture of the concrete backer board in place for the grill.


The remaining portion of the concrete was removed and faced with stone to match the entire step.


Two things in this picture. Yes we have things staged in a very tight space. We are trying to minimize the area we are tearing up. Second notice the use of string lines to ensure the walls are running at 45 degrees to the house.


The free standing wall is almost finished. Next week I’ll probably show the impact the wall makes from a spacial design perspective.

Helleborus

Specifications Of The Helleborus (Christmas Rose) Plant

Hellebore are often called Lenten Rose or Christmas rose, these evergreen perennials are almost a staple in the winter garden. This plant was named 2005 perennial plant of the year by the Perennial Plant Association. The flower color range from pure white to plum, bordering on black also yellow, pink, and red. They come in single to semi-double, and bloom from late winter to late spring some lasting two months or more. These plants have a clumping growth habit and get to 24 inches tall and 30 inches wide. Although sold as shade-loving plants these plants can take a lot of full sun and range into deep shade. This plant will thrive in a wide range of soil conditions, they are often found native in alkaline soils, but adapt to very acid woodland soils. When installing new plants pick a well drained site this plant does not like to be water logged, but it is very drought tolerant. Incorporate lots of organic material and plant like any other perennial. Long term exposure of this plant to the skin can cause a reaction that can last for a few hours, so when handling this plant wear gloves. One good thing from this is deer will not eat it so your hellebore will not become a salad buffet for foraging deer. The best way to reproduce this plant is by division that way each plant is identical. This plant will propagate its self by dropping seed to the ground around the parent plant, this seed will take 2 to 3 years from seed to flower. The Lenten rose will respond well to many different conditions, hellebore will make a fine addition to any garden.