Author Archives: Brad

Garden Art???

A lot of people ask me what does a landscape designer do in the winter? My response is usually a lot of planning for the spring. My planning is mostly consumed as the co-owner and not as the designer. I prefer spending time working on designs, so we are ready for the hectic spring. Next week I will feature a pool project. Check in. This is a must see project. We actually started the design process in the fall of ’07 and had them swimmer for the summer of ’08. It is never to early to start planning.

This winter has been a little different. I spent the last couple weeks painting a mural in my basement. I love to put a creative touch to almost everything I do. I designed the layout of my basement and some day will post that as well. I have always been intrigued by painting and never made the time to take it up as a hobby. This was my first painting and I found it very interesting to learn how the different paints respond to different brushes. The mural is in my kids play room which will most likely turn into something else some day.

Landscape Designs With Garden Wall Art

Spending years coloring drawings, I natural was drawn to a landscape scene. I love the sense of age stone walls bring to the landscape. The containers sitting in the window sills show someone has taken ownership of this old stone ruin. Leaving the grasses to grow in front of the wall is demonstrating design constraint. The simplicity of the nature allows the wall to speak for itself. As designers, we often fail by trying to add vs. letting along. We need to ask ourselves are we really enhancing the view, the space, or the function by adding more.

I’m not sure when or if I will ever do another painting like this. I guess time will tell. I’m sure I will continually make touch ups or improvement as time passes. Maybe I’ll follow my own advise and let alone what is already finished…


Metasequoias (Dawn redwoods)

Specification Of The Metasequoias (Dawn Redwoods) Tree

Dawn redwoods are in a small class of trees known as deciduous conifers. This means it does produce an evergreen type needle but it looses it every fall, also in this group are baled cypress and larch. One of the interesting facts about this group of trees is that they are regenerative, this means that if you were to cut down a dawn redwood it would regrow from the stump to form a new leader. The root flair of this tree is one of the most outstanding parts. With its orange/brown color it produces several large buttress like root flairs that extend several feet up the trunk. This tree produces small upright spreading branches that are well attached to a straight central trunk. This tree requires very little pruning to keep its pyramidal form. Optimal growing rate for this tree is about seven feet a year, for that you will need full sun, lots of deep ground water and a well drained, acidic soil. Many dawn redwoods in this country that are less than fifty years old have already reached the 100 foot mark. Although it is a very fast growing tree, it does not like to be crowded among other trees, it will not do very well in that situation at all. The lacy green fern like foliage that comes out in spring and lasts though the summer months turns a yellow /orange color after the first frost. Like the baled cypress it will grow in standing water, so it is a very good plant for wetland areas. Lighting protection is recommended for older trees since they are usually the tallest trees and would be the first ones hit. So if you are looking for a large mejestic giant for your garden give this plant another look.

Week Three: Getting so so Close.


Wow what a change this week. That is how a lot of projects go. You don’t see much happening and then all of a sudden instant change. I think this is the cause in so many hardscape projects because so much goes into taking measurements, shooting grades, and preparing the base. These are things you may not appreciate at the time a project is done, but it means everything when you look at your projects durability.

I said I would go over some smart design choices that saved money and also extended durability. One smart design choice was the location of the grill and step. The upper patio will serve as a grilling station and a transitional landing for the lower dining area. Keeping the grill on the existing concrete pad helped save cost from pouring more concrete or digging footers. We were able to frame right on the concrete pad. Having the grill at the far side of the patio helps give a cozy nestled in feel.

Matching Landscape Stone Designs To Grills

The existing concrete size was perfect. We did not feel the need to extend the upper level out at all. This saved the cost of adding block work that would have been needed if we were to extend out the upper patio. We chose to face the existing concrete to match the stone on the grill. The stone does a couple of things. First, it brings continuity. Secondly it brings durability and stability to the step elevation. The alternative would be to face the step with a decorative block. I didn’t like that idea for one main reason. It would be very hard to ensure the block wouldn’t settle at least an 1/8″ over the next ten years. When this happens the top patio and the step will no longer be level causing a trip hazard. As we have it, if the lower patio settles an 1/8″ over ten years, you won’t notice the step is now 6 1/8″ instead of 6″. Finally it was less expensive and faster to install.

We now have everything finished except the lighting and some plantings. I’m looking forward to getting the boxwoods in. I think they will really help form the space. I think if we get about two or three nice days we will be able to finish. I wish I knew when that would be. I’ll keep you posted.

Week Two: Another wet week and getting colder

Concrete Backer Boards In Place For Grill

Well, you never know how much work you are able to get done in December. We were able to get a little farther this past week. We got rained out one day and froze out on Friday. It looks like we might have some warmer weather to start off the week. Let’s hope it stays dry before the colder temperatures come in toward the end of the week.
Better picture of the concrete backer board in place for the grill.


The remaining portion of the concrete was removed and faced with stone to match the entire step.


Two things in this picture. Yes we have things staged in a very tight space. We are trying to minimize the area we are tearing up. Second notice the use of string lines to ensure the walls are running at 45 degrees to the house.


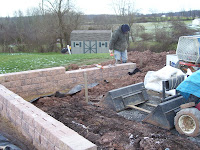
The free standing wall is almost finished. Next week I’ll probably show the impact the wall makes from a spacial design perspective.

Helleborus

Specifications Of The Helleborus (Christmas Rose) Plant

Hellebore are often called Lenten Rose or Christmas rose, these evergreen perennials are almost a staple in the winter garden. This plant was named 2005 perennial plant of the year by the Perennial Plant Association. The flower color range from pure white to plum, bordering on black also yellow, pink, and red. They come in single to semi-double, and bloom from late winter to late spring some lasting two months or more. These plants have a clumping growth habit and get to 24 inches tall and 30 inches wide. Although sold as shade-loving plants these plants can take a lot of full sun and range into deep shade. This plant will thrive in a wide range of soil conditions, they are often found native in alkaline soils, but adapt to very acid woodland soils. When installing new plants pick a well drained site this plant does not like to be water logged, but it is very drought tolerant. Incorporate lots of organic material and plant like any other perennial. Long term exposure of this plant to the skin can cause a reaction that can last for a few hours, so when handling this plant wear gloves. One good thing from this is deer will not eat it so your hellebore will not become a salad buffet for foraging deer. The best way to reproduce this plant is by division that way each plant is identical. This plant will propagate its self by dropping seed to the ground around the parent plant, this seed will take 2 to 3 years from seed to flower. The Lenten rose will respond well to many different conditions, hellebore will make a fine addition to any garden.

Red Chokeberries

Specifications Of The Red Chokeberries Plant

Red Chokeberry is a native plant to North eastern America, It was found growing in wet woods and wetlands. Chokeberries are attractive ornamental shrubs, naturally understory and woodland edge plants. Because they are native plants they are insect, pollution, and disease resistant. There are two well kn
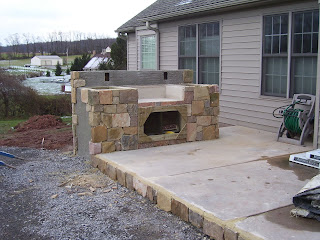
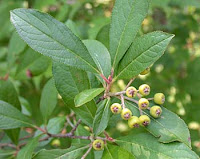
own species named for there colored fruit, red and black. This plant is a multi stemmed shrub, 6-12 feet tall and spreads readily by root sprouts. This is truly a plant for four seasons, in spring it produces clusters of white, five petaled flowers. They give way to dark green foliage throughout the summer months. This foliage turns from a lush green to a orange/red that really stands out in the fall garden. Also appearing are the bright red, pear shaped berries. These berries persist on the plant though December and January and along with the reddish brown exfoliating bark really standout in the winter landscape. Although the fruit persist though most of the winter, they are occasionally eaten by game birds and song birds and reportedly by bears. Because this plant is self pollinating only one plant is needed to produce berries. The juice from the berries is not sweet but is high in vitamin C and antioxidants. The berries can be used to make wine, jam, syrup, juice, soft spread, and tea. So if you are looking for a plant to spruce up your winter garden, give this plant a try.

Winter King Hawthorn

Specifications Of The Winter King Hawthorn Ornamental Tree

One of the showiest ornamental trees for the winter garden is Winter King Hawthorn. The orange/red fruit which persist on the naked tree throughout the winter makes this a tree anyone would want in there garden. Unlike other hawthorns it has has very small thorns that are inconspicuous. Also unlike other hawthorns this plant is somewhat disease and pest free. This small to medium size tree will get to 20 to 30 feet in height and width. That makes this tree a good choice for small gardens, it is also a very good tree in urban areas were air pollution, poor drainage, compacted soils, and drought are common. The 2 inch clusters of white flowers that open in mid May, show up very nicely against the glossy green foliage. The outer bark of this hawthorn is beige-gray, which exfoliates to expose a warm cinnamon color under bark. The younger branches are a silver-gray color, bearing 1 inch thorns. The fall color although not its primary feature turners from green to a golden yellow, with hints of red and maroon. For winter interest, this is a plant that’s hard to beat.

Week One: Patio, Planting, Grilling Station and Lighting Transformation

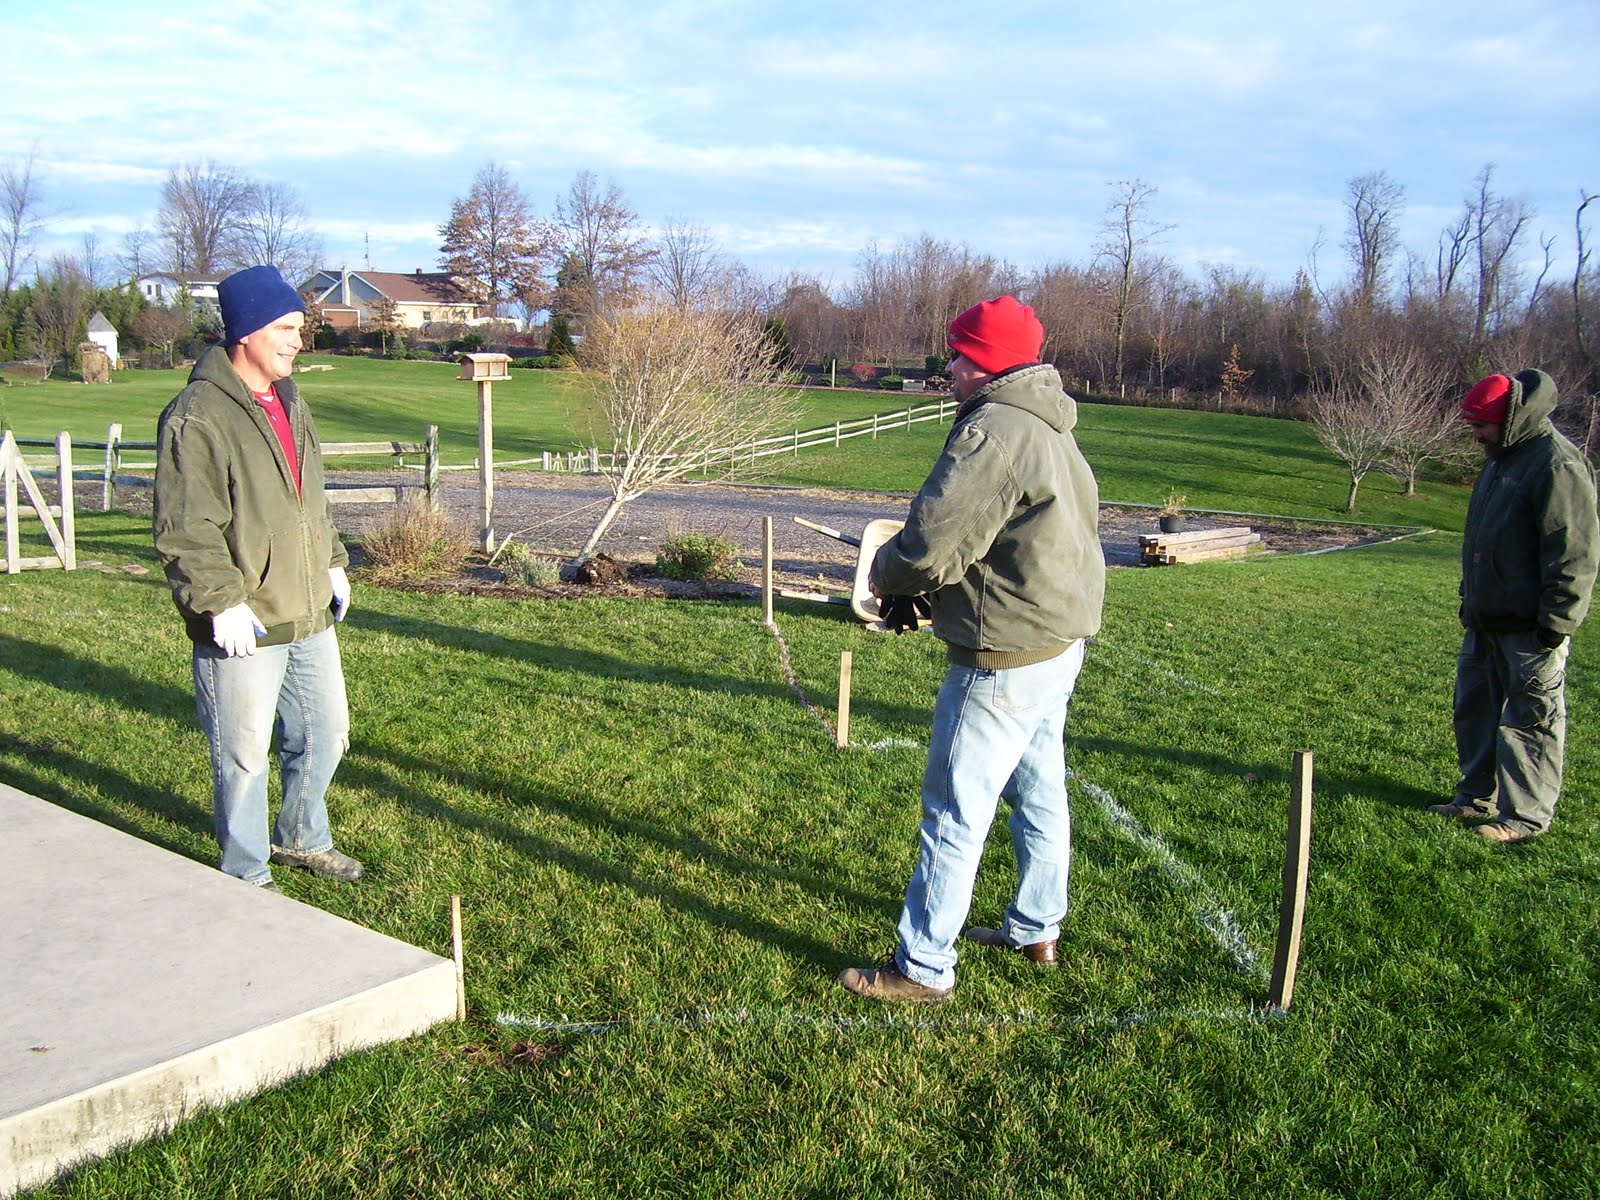
We had some tough site conditions for our first week. I think we where able to give our client a good visual of the upper and lower spaces. Brian started constructing the shell in sections at our shop on Thursday. Although the rain stopped earlier than expected, we would have done more harm than good working at the site. This prep work allowed for quick installation when we arrived Friday morning.


How We Transformed An Outdoor Patio In One Week


Friday we cut openings in the concrete to allow access for the electric and gas lines. Trenches were also dug to run the lines back to the house.

Safely Cutting Concrete For Backyard Patio Design

The Grilling Station was fastened into place. Tar paper and most of the wire mesh was applied. Some of the concrete backer board was installed to protect the framing from the heat of the grill. Two air vents were cut in to the backside to allow more heat to escape.

Boulders were set in place at the lower corner of the basement to retain the slope. The boulders stopped here to allow for stone slab steps to be installed at a later date.

This picture begins to show how we cut off the corner of the dog training area. This was first done because of a miss measurement, but I think it will actually integrate the two areas nicely. When the free standing wall is built it will tie together even stronger.


Patio, planting, grilling, and lighting

Oops! I have to confess. I made a mistake when measuring the property. You can see in the photo to the right how our wall is going right over the corner of the dog training area. I talked to our client about the options and we came to a conclusion. We will cut off the corner of the dog training area by about 5′. I think this will work well and not compromise the integrity of the design.

The past two days we were able to get a lot done. We have the patio excavated and the stone base started. The downspouts were extended and backfilled. We got measurements of the grill today, since there is rain in the forcast for tonight and tomorrow. This will allow us to start constructing the frame tomorrow at our shop. Our goal is to have the grilling station set in place for the weekend. This will allow the templating for the granite countertop to be down early in the project. Hopefully the countertop can be cut while we are working on the rest of the project. Having the grilling staion set in early will also allow flexibility in the schedule for the electric and gas lines to be run.

Turkey & Tranformation, neither were dry!

The Turkey and Thanksgiving were great. I wish I could say the same for the start of our transformation project. We got about two hours in today before it started to rain. Welcome to the world of landscape contracting.

Landscaping During Thanksgiving

We did get the patio sprayed out, some elevations verified, and the paving material delivered. The grill will be delivered later today. We will use the rest of today to get the framing materials for the grilling station.

Hopefully it will stop raining soon and we can have a better day tomorrow.